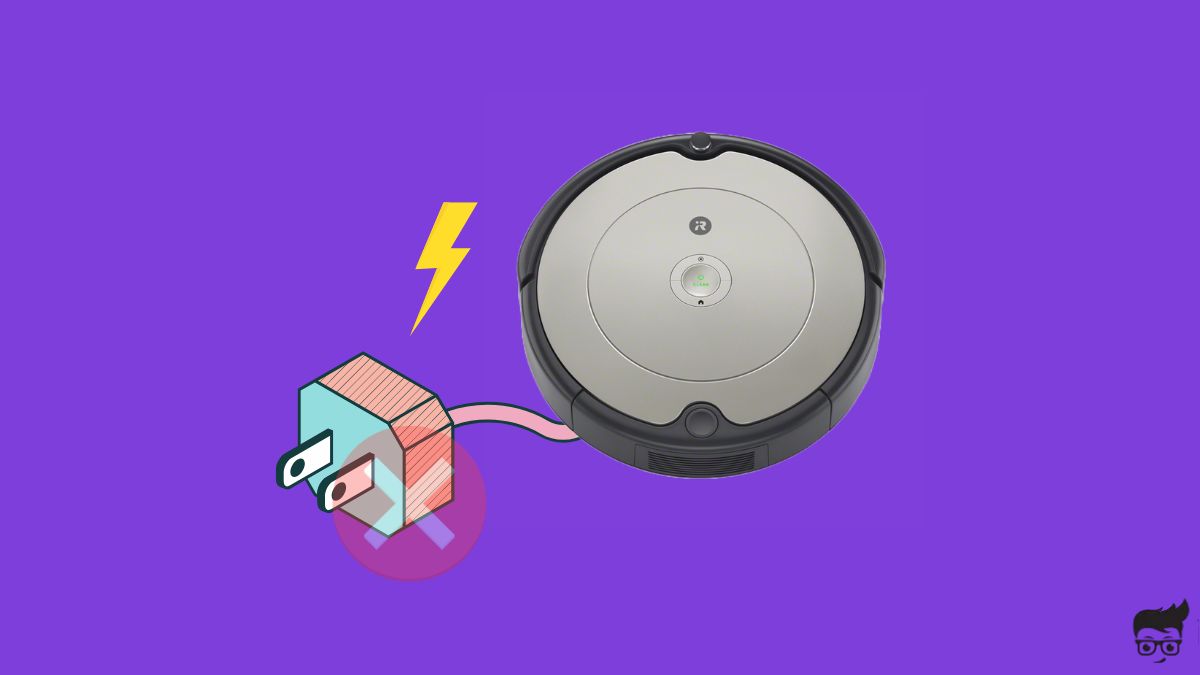
Is your Roomba robot vacuum not charging? Let’s fix it.
As you may already know, Roomba charges automatically.
You don’t have to do anything to charge Roomba.
If Roomba is already in a cleaning session and the battery is too low, Roomba will automatically return to the dock, charge itself and then continue cleaning.
But if the Roomba does not charge, it won’t be able to continue the cleaning session or start a new one.
There are a couple of common reasons why your Roomba is not charging.
In this article, you will find out why your Roomba is not charging at how to fix a Roomba that does not charge.
Why My Roomba Is Not Charging?
Dust and dirt particles or debris accumulating on the charging contacts on the Roomba or the charging station is why your Roomba is not charging. Power issues with the wall outlet, broken cables, or battery issues may also cause the same problem.
- Dirt On Charing Contacts: If dirt or dust particles buildup on the charging contacts, your Roomba won’t charge unless cleaned.
- Faulty Wall Outlet: A faulty wall outlet will become unable to send power to the charging station, and in turn, fails to charge Roomba.
- Issues With The Battery: Issues with the battery can also cause your Roomba not to charge. Removing and reinstalling the battery has helped many to fix the problem.
- Glitch: At times, the Roomba robot vacuum glitches, making it unable to charge. Restarting the Roomba and resetting it can help fix the problem.
Charging Roomba takes some time, you should wait at least an hour after putting it for charging. See how to know if your Roomba is charging.
How To Fix Roomba Not Charging?
If your Roomba is not charging, clean the charging contacts on the robot vacuum and home base. Take a microfiber cleaning cloth and clean the contacts. Try switching the wall outlet, rebooting the robot vacuum, and finally, factory reset it if nothing helps.
Clean The Charging Contacts On Roomba & Dock
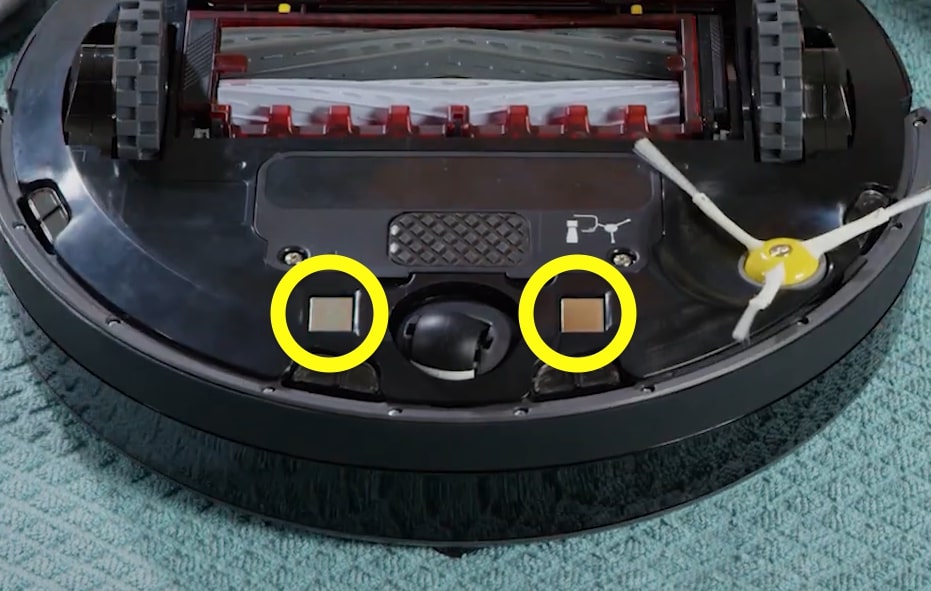
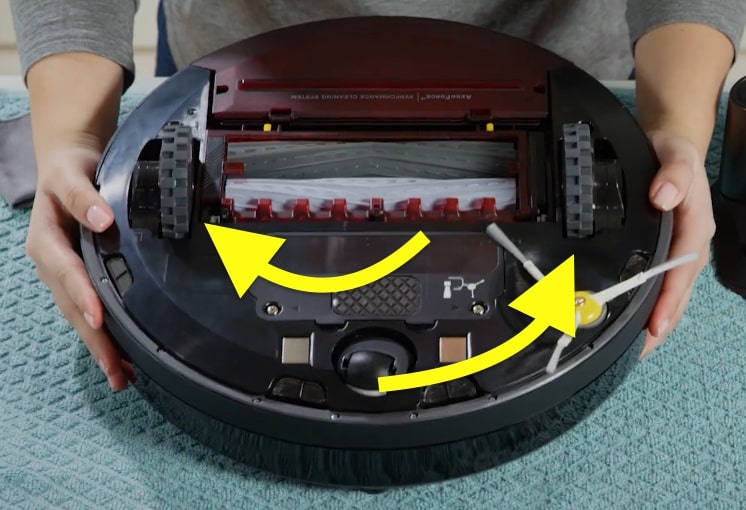
If your Roomba is not charging, you first need to check and clean the charging contacts or points on both Roomba and the charging station.
For starters, there are a couple of charging contacts on Roomba and the charging station, which, when comes in contact, charges the robot vacuum.
If dust or dirt particles accumulate on top of the charging contacts, the charging station will become unable to connect to Roomba and charge the same.
So, let’s start by inspecting the charging contacts to see if it is covered by dirt.
If yes, take a microfiber cleaning cloth and gently wipe and clean the contacts on the Roomba robot vacuum.
Next, clean the charging contacts on the charging dock/home base.
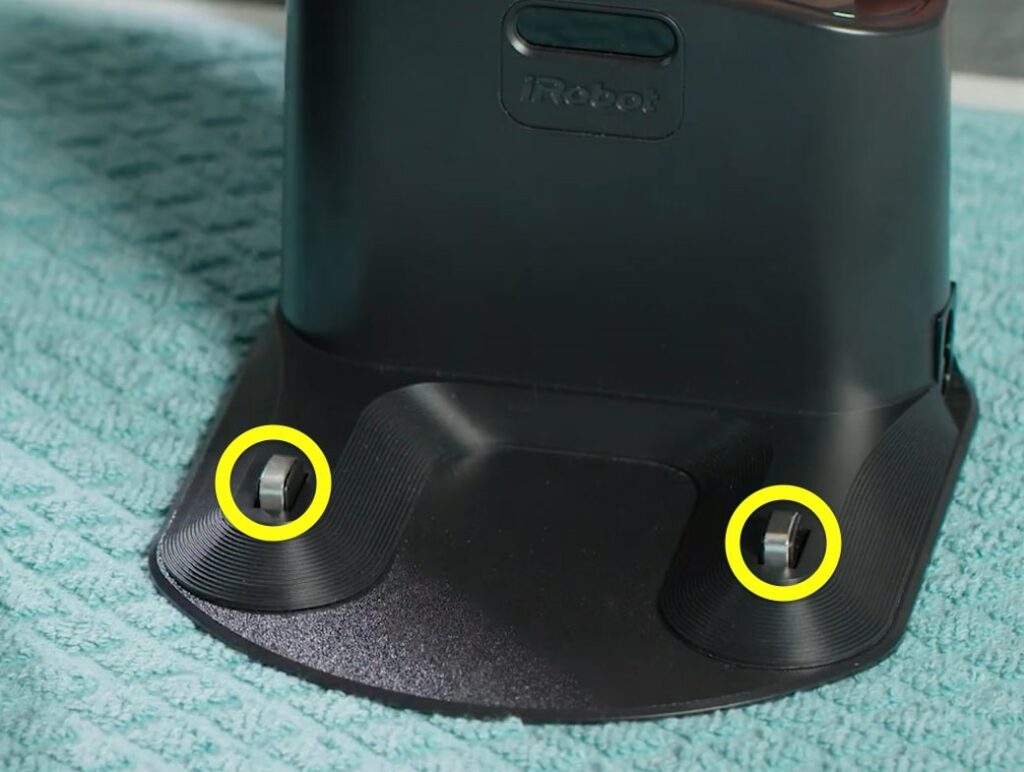
Refer to the image to locate the charging contacts on Roomba.
Switch The Wall Outlet
The problem doesn’t necessarily have to be with Roomba or the Home Station or Clean Base; it can be with the wall outlet, too.
Sometimes, the wall outlet may fail to provide enough power to the Roomba dock.
To see if there is an issue with your wall outlet, you may try connecting the home base to a different wall outlet and see if it charges this time.
Similarly, you may connect any other device to the same wall outlets and see if it can provide power to the same.
If you use an extension cord to connect to the Roomba dock, try disconnecting the extension cord and directly connecting the cable to the wall outlet.
Remove & Re-insert The Battery
If the battery is not connected correctly, your Roomba won’t charge.
Similarly, removing and re-inserting the battery has proven to fix charging-related problems on Roomba.
Follow the steps below to remove and reinstall the battery:
Firstly, detach Roomba from your homebase.
Place the Roomba upside down on a table.
Using a screwdriver, remove the side brush.
Once removed, unscrew the four screws to remove the bottom cover.
Now lift the bottom cover to reveal the battery.
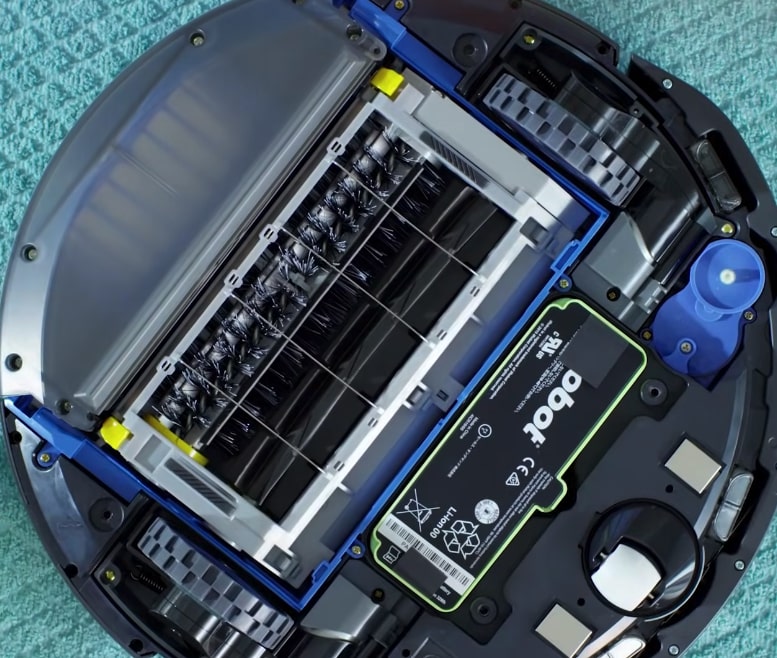
To either side of the battery, you will find two ribbons to pull it up. Pull the battery out.
Wait for a minute.
Place the battery in.
Close the back panel.
Attach the side cleaning brush.
Place Roomba on the dock and see if it charges.
Clean The Wheels
You may wonder how cleaning the wheels helps to charge Roomba.
Well, when debris builds up on the wheels of your rumba, it increases the overall height of the robot vacuum, and the charging contacts won’t be able to come in contact.
You may use a brush to clean all the dirt, dust, and debris buildup on the wheels.
You must clean both wheels, including the driving wheels and the caster wheels.
Once cleaned, now place Roomba back onto the dock and see if it charges.
Inspect The Cable
If the power cord connecting the home base or clean base to the wall outlet is damaged due to cuts or fraying, you must replace the cable.
Start by unplugging the Roomba home base.
Closely examine the line code and see if you can spot any damage.
If yes, it might be why your Roomba is not charging.
Buy a new line cord, connect it to the dock, and see if it charges now.
Reebot Roomba Vacuum
Like other electronic devices, Roomba is also prone to glitches or bugs that may make the robot vacuum malfunction.
The simple fix to get rid of any glitch is to reboot it.
So all you need to do is reboot Roomba and see if it fixes the problem.
Follow the steps below to see how to reboot your Roomba.
Suppose you own an 800, 700, or 900 series Roomba; press and hold the “CLEAN” button on top of the robot vacuum for 10 seconds. It will now reboot Roomba.
If you own an S or I series Roomba, press and hold the “CLEAN” button for 20 seconds. The ring light will turn off, and the Roomba will reboot.
Factory Reset Roomba
If nothing so far helped you fix Roomba not charging problem, it’s time to factory reset it.
Factory 600, 800, 900, S, I, and E series:
Ensure Roomba is turned on.
Locate the Home and Spot Clean buttons.
Press and hold the Home and the Spot Clean button for 10 to 20 seconds and release as soon as the LED lights flicker or you hear a chime.
Factory J series:
Ensure the Roomba is turned on.
Remove the dust bin.
Find the ‘CLEAN‘ button on top of the vacuum.
Press and hold the CLEAN button for 10 seconds.
Post 10 seconds, Roomba will make a sound.
Press the ‘CLEAN’ button once again to confirm to factory reset the robot vacuum.
Once you reset Roomba, you need to use the iRobot app to set up and configure the robot vacuum all over again.
Factory resetting Roomba will help you fix it if it is not connecting to WiFi.
Contact iRobot Support
If Roomba is not charging even after trying all the troubleshooting steps above, including factory resetting it, it’s time to contact iRobot support to find a resolution.
You can get in touch with iRobot support in a couple of ways.
Follow any method convenient to you.
Call (US & Canada) – 1-866-747-6268
Monday through Friday: 9:00 am – 9:00 pm EST
Saturday & Sunday: 9:00 am – 6:00 pm EST
Web support: click here
What’s Next?
Now that you finally got your Roomba charging again, you may continue with your regular cleaning routine.
If Roomba fails to charge again in the future, the first thing to do is to examine the charging contacts and clean the debris buildup on the same. You must clean the charging contact on the robot vacuum and home dock.
If nothing helps, try factory resetting the robot vacuum and contacting iRobot support.