The experience of using Apple AirPods is top notch till you encounter errors connecting them to your Mac. No matter what you do, the AirPods won’t connect to Mac.
A countless number of people are facing issues connecting AirPods to Mac. If you are, too, facing issues where the AirPods is not connecting to Mac, this guide is for you.
One fine day, I ran into the same issue: I could not connect my AirPods Pro to my MacBook. After searching for solutions for hours, I discovered the problem and connected AirPods to Mac.
Let’s look at the step-by-step guide on fixing AirPods that won’t pair with Mac.
AirPods Won’t Connect To Mac
If your AirPods won’t connect to Mac, close the lid, wait 30 seconds and open the lid. Now press and hold the button on the charging case for 10 seconds until the white status light starts to flash. Now try to connect your AirPods to Mac, and it should work.
Properly Put AirPods Into Pairing Mode
If this is your first time connecting AirPods to your Mac, you must adequately put the AirPods into pairing mode.
Without setting AirPods into pairing mode, you won’t be able to find it on your Mac and connect.
Follow the steps given below to put your AirPods into pairing mode to connect them to a Mac.
- Close the lid and wait for 15 to 30 seconds
- Open the lid
- Press and hold the setup button on the AirPod’s charging case for about 10 to 15 seconds
- Release the button when a white light starts to flash
- Your AirPods are now in pairing mode.
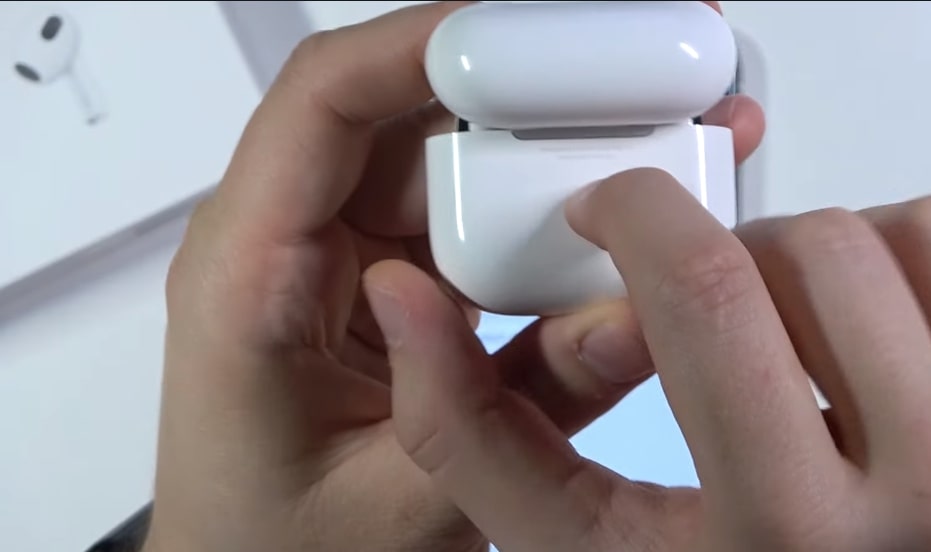
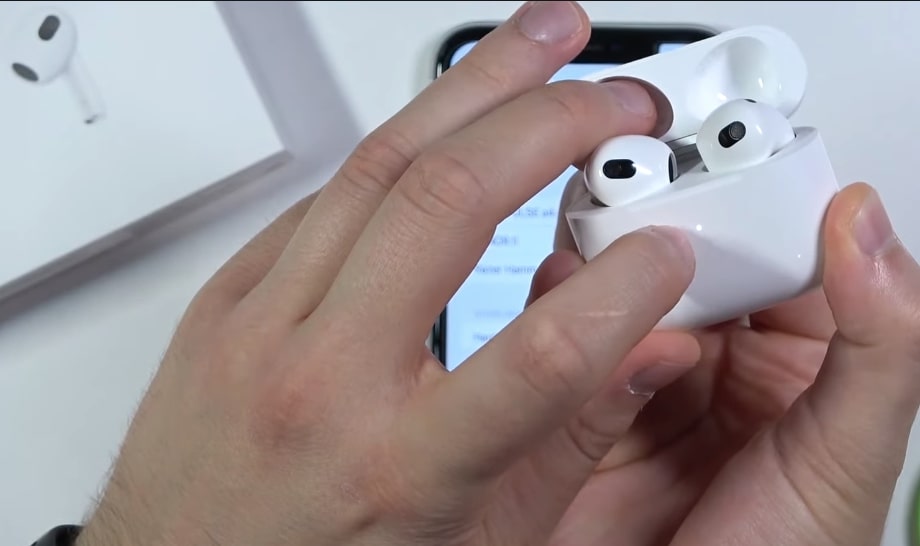
Once your AirPods is in pairing mode, open the Bluetooth settings, find the AirPods and connect them to your Mac.
Many people forget to put their AirPods into pairing mode and try to connect them to the Mac. Without putting the AirPods into pairing mode, you won’t be able to connect them to any other devices, not just Mac.
Make Sure AirPods Have Enough Charge
Both your AirPods charging case and AirPods should have enough charge before you try to connect them to your Mac.
AirPods need to be charged to work. Before trying to connect again, make sure it has enough charge left. If not, charge them before connecting.
Charge The Charging Case
Your AirPods charge while it is connected to the Charging Case. For the AirPods to charge, firstly, the charging case should be charged.
So the first step is to ensure enough charge on the charging case.
If your AirPods are already connected to your iPhone or iPad, you can quickly check the charge of the AirPods. Close the charging case’s lid and bring it closer to your iPhone or iPad.
A small popup will appear, showing you the charge left in the AirPods and charging case.
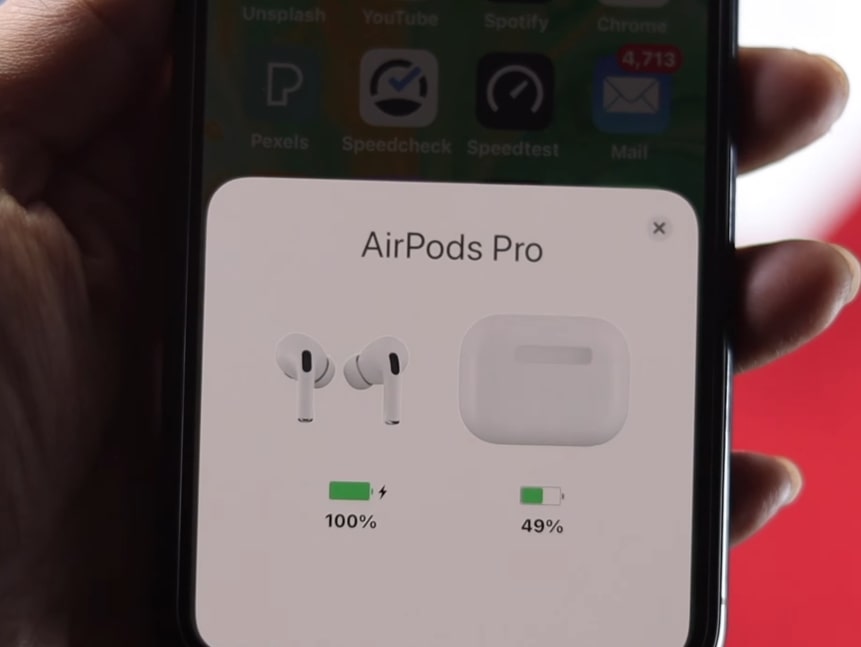
If the charge is too low, connect it to a charger and charge it before you try to connect it to your Mac again.
Charge The AirPods
Even if the charging case’s battery is 100% full, that doesn’t mean that the individual AirPods are fully charged.
You need to place the AirPods inside the charging case and close the lid for it to charge. If it’s been some time since you put them back into the charging case, the AirPods might be low on charge.
To see the amount of charge left in the AirPods, you can place it in the charging case and bring it closer to your iPhone or iPad.
In this case, all you have to do is place the AirPods back in the charging case, close the lid, and wait until the AirPods acquire enough charge.
You can then try to connect to your Mac, which should connect this time.
Clean Charging Case
For your AirPods and charging case to charge, the connector on them should be free of dust and dirt particles.
If the connecter is covered with debris, then even if you connect it, the case won’t charge at all.
Firstly, examine the charging port of your AirPods and see if nothing is stuck inside. If you find some debris inside, use a lint-free cloth or anti-static brush to pull it out.
You may even use cotton earbuds to clean it. Just put it inside the AirPods case and gently twist it to remove any dust or debris.
Similarly, open the lid of the charging case and ensure the connector pin is also free of dust and dirt. If the connector pin is covered with foreign particles, you must wipe it to make it dust-free.
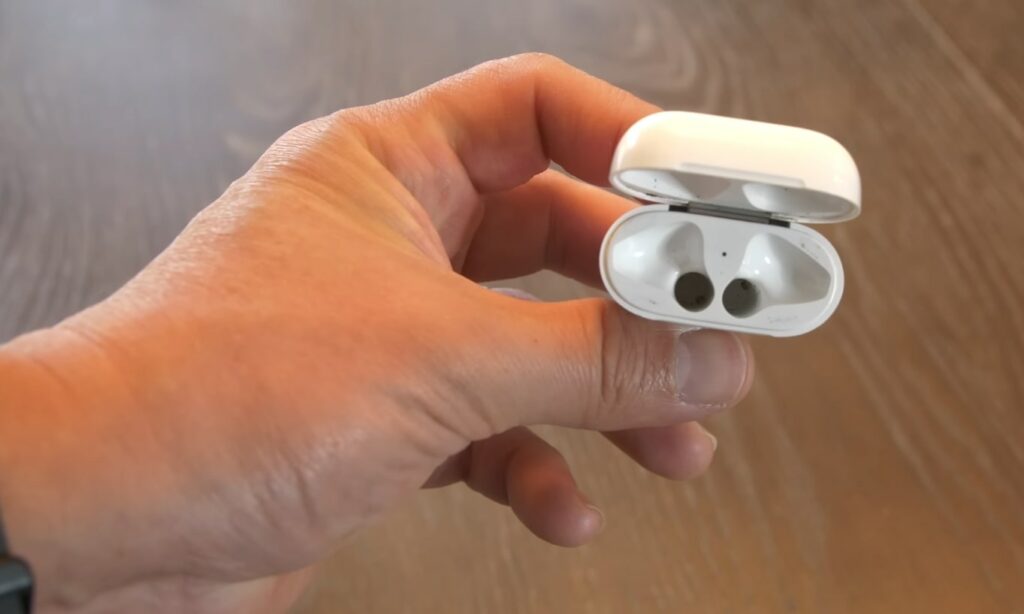
It is through these connectors that the individual AirPods get charged from the AirPods case.
Clean AirPods
Like cleaning the charging case, you also ed to clean the AirPods.
Over time, many dust particles might accumulate on the charging connector pin on the AirPods, so cleaning that should fix the problem where it does not charge.
Pull out the AirPods from the charging case and place them upside down.
Closely examine the bottom section of the AirPods stem to see if any dust particles are blocking the charging connector.
Grab a lint-free cloth and wipe the debris from the AirPods. You may also use clean earbuds to clean them as well.
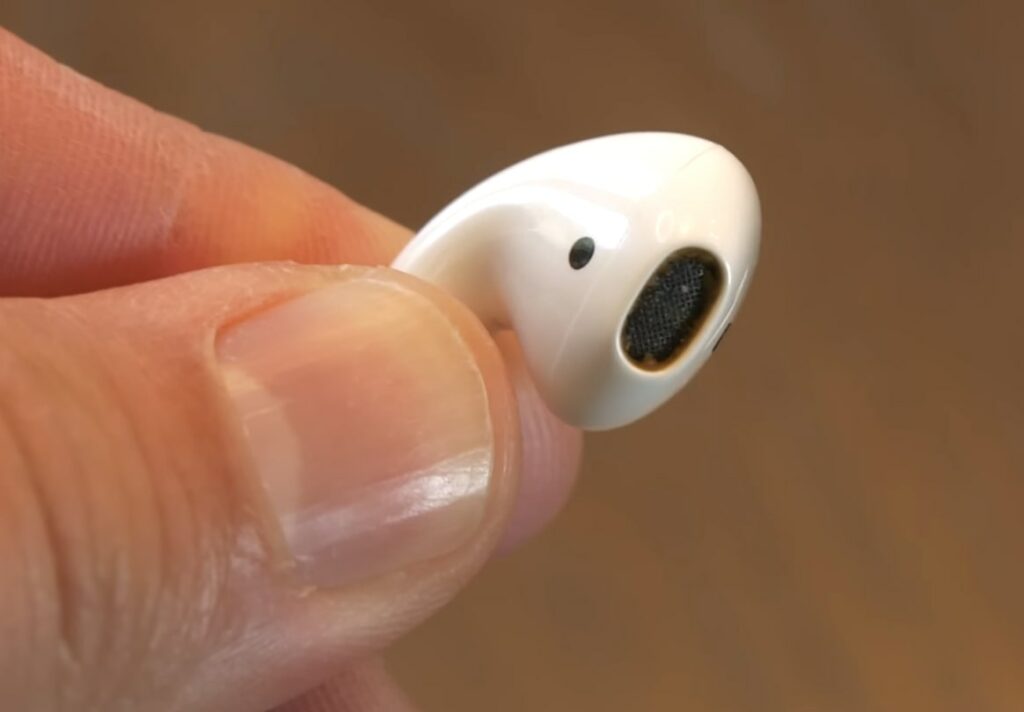
Once cleaned, place them back in the charging case. If you hear a subtle clicking sound, it means the AirPods are ready to be charged, provided there’s no issue with the connector pin.
Ensure Bluetooth Is Turned On
AirPods connect to your Mac via Bluetooth. So it’s vital to have Bluetooth enabled on your Mac. If Bluetooth is not enabled, the AirPods will fail to connect.
You can easily enable Bluetooth on your Mac in a couple of steps. Let’s see how.
- Click on the Apple menu from the top left corner
- Click on System Preferences > Bluetooth
- Make sure the Bluetooth status is turned on. If not, click on the Turn Bluetooth On button
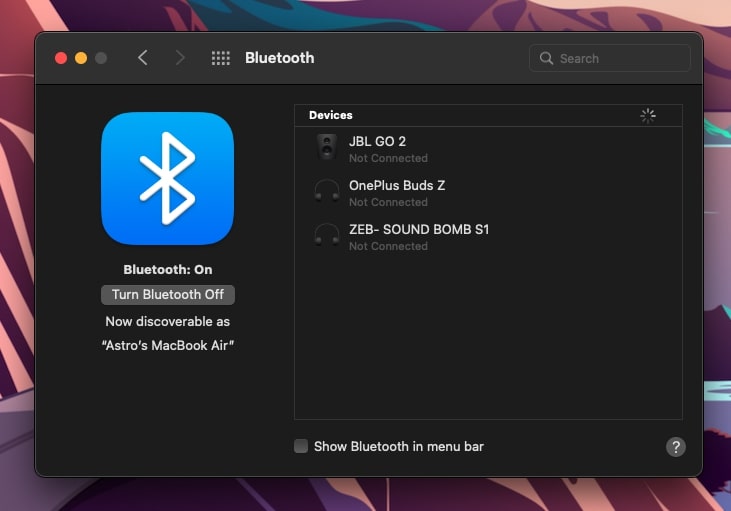
Once the Bluetooth is turned on, try connecting your AirPods, which should work this time.
Select Proper Audio Output Source
Even if you connect your AirPods to the Mac, for the sound to come out through the AirPods, you need to set up the correct audio output source.
You may have multiple audio devices connected to your Mac, like external headphones, speakers, or even the inbuilt MacBook speaker.
Selecting the correct audio output is crucial for the AirPods to work on your Mac.
Click the Audio icon from the menu bar
Under Output, select your AirPods
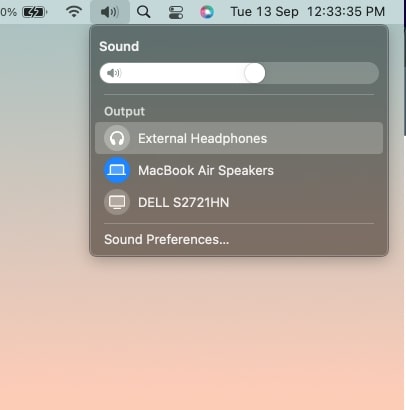
Now that you have selected the AirPods as the output source try playing music and see if the sound comes out through the AirPods.
Update macOS To The Latest Version
Your Mac should run the latest version of macOS to get the best experience. With every new update, Apple introduces many bug fixes and new features. So it is advised that you update your Mac or MacBook as soon as a new update is available.
A Mac running an older version of macOS can sometimes cause issues with the AirPods making it not connect.
The simple solution is to check for any pending updates.
- Click the Apple icon from the menubar
- Select About Mac
- Click the Software Update button
- Wait for a couple of seconds and see if an update is pending to be done.
- Click the Update Now button.
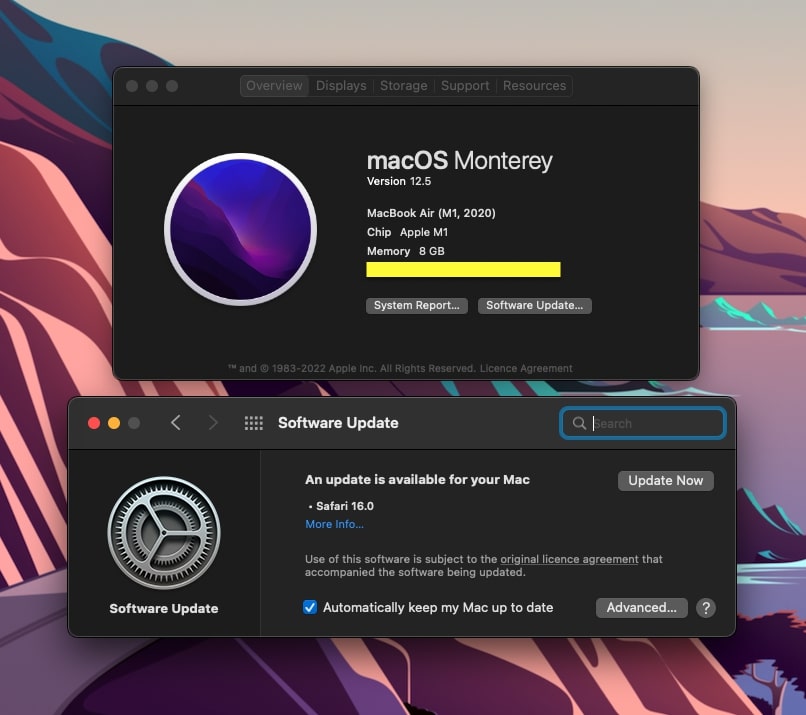
Once updated, you may try pairing your AirPods with your Mac.
Manually Connect AirPods To Mac
Did you know that you can manually connect your AirPods to the Mac?
At times, the automatic connection might not happen. But don’t worry, as we can manually connect AirPods to Mac via Bluetooth settings.
Click the Apple icon from the menu bar
Select System Preferences
Click on Bluetooth
Go through the list of devices shown in the Bluetooth settings
Find and double-click the AirPods to connect to them manually.
Remove And Add AirPods To Your Mac
If manually connecting AirPods to your Mac didn’t work, then let’s try removing and adding AirPods to your Mac again.
Follow the steps below to forget AirPods on your Mac and add it again:
- Click the Apple logo from the top left corner of the menu bar
- Select System Preferences > Bluetooth
- Find your AirPods from the list of devices
- Click the X button right next to the name of your AirPods to remove it from the Mac
- Click the Remove button on the confirmation popup that appears.
- Restart your Mac or MacBook
- Now put AirPods into pairing mode and try to connect it to your Mac manually.
Disable Bluetooth On Other Devices Nearby
If Bluetooth is enabled on other devices near the AirPods, it can sometimes interfere with the connection process. You may try disabling Bluetooth on other devices and then try to connect AirPods to your Mac.
If you have previously connected AirPods to other devices nearby, then chances are your AirPods might be automatically connecting to them. This might be why the AirPods fail to connect to your Mac in the first place.
Grab all the devices you have connected to the AirPods in the past, and simply turn off the Bluetooth. Also, make sure the AirPods are not already connected to them before trying to connect them to your Mac again.
Restart Mac
Temporary software glitches will stop your AirPods from getting connected to your Mac.
The simple solution is to restart your Mac to see if that fixes the issue. It might sound silly, but many people have successfully connected their AirPods to the Mac by simply restarting the computer.
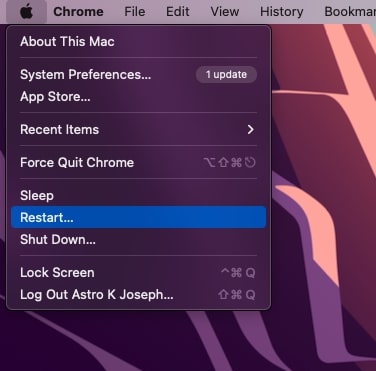
Restarting your Mac will eliminate software glitches that might interfere with the AirPods connection process.
Use The Same Apple ID
If both your AirPods and Mac is logged into the same Apple ID, it will help your AirPods to connect to your Mac automatically. If that is not the case, it is advised that you use the same Apple ID on your AirPods, Mac, iPhone, and iPad.
Follow the steps below to reset your AirPods and connect them to your iPhone with your primary Apple ID. Now use the same Apple ID to pair your AirPods with your Mac, which should help you connect your AirPods automatically.
Reset AirPods
The final thing to do is to reset your AirPods to make them work with your Mac again.
Resetting the AirPods will disconnect and remove them from every other device to which it was connected in the past. Once reset, you’ll have to repair it with other devices again.
- Place both the AirPods into the charging case and close the lid
- Wait for a minute
- Now open the lid of the charging case
- Grab your iPhone or iPad and head over to Settings > Bluetooth settings
- Find the AirPods from the list of devices and tap on the ‘i’ button next to the name of the AirPods
- Tap the Forget This Device button
- Confirm the same on the popup that appears.
Now we have successfully reset and removed AirPods from our devices.
Now let’s re-pair AirPods.
- Open the lid of the AirPods charging case and press the setup button for about 15 seconds until the white status light starts to flash.
- Bring the AirPods closer to your device.
- A popup will appear telling you a new AirPods has been detected.
- Follow the on-screen instructions to connect it to your device.
Resetting will also help you fix AirPods making a weird high pitched noise or beeping sound and double tap touch control not working.
Get Your AirPods Repaired
If none of the troubleshooting steps helped you connect your AirPods to Mac, then it’s finally time to contact Apple and get your AirPods repaired.
As a final resort, resetting your AirPods should fix all the temporary issues that might be stopping your AirPods from connecting to Mac. But even after resetting your AirPods, it’s finally time to take your AirPods to the nearest Apple service center if nothing changes.
You can head to the Apple Products Support page to connect to an Apple specialist via call or chat.
You may also try searching for the nearest Apple service centers and take your AirPods there to fix it.
Why Is AirPods Not Connecting To Mac?
There are several reasons why AirPods will fail to connect to a Mac. Below are some common reasons your AirPods won’t connect to your Mac.
Outdated macOS Version
Older versions of macOS lack a lot of new features and bug fixes. You must ensure that your Mac or MacBook is running the latest version of macOS to get the best-in-class experience.
At times, Apple discovers ongoing bugs in the operating system’s current version and releases new updates to fix them. And for you to get that bug fixed, you need to update your Mac to the latest version. Updating macOS will also give your Mac new features and security patches.
Lack Of Charge
No matter what you do, if your AirPods or the charging case doesn’t have enough charge, it simply won’t be able to connect to your Mac. You should ensure that both the AirPods and charging case has enough charge before you try to connect it to the Mac.
You might also want to clean the connector pins on the charging case and the AirPods to ensure they get appropriately charged.
Dust & Dirt Covering The Connectors
Over time, dust, dirt, and debris might accumulate on the charging connector pins of the AirPods and the charging case. It will make your AirPods not charge.
You need to occasionally clean the connector pins to ensure they are free of dust and dirt.
Bluetooth Disabled
AirPods connect to your Mac via Bluetooth. So Bluetooth must be enabled on your Mac. If Bluetooth is disabled, the AirPods will fail to connect to your Mac. This is one of the common reasons why people find it challenging to connect the AirPods to Mac.
Conclusion: AirdPods Successfully Connected To Macbook
Ensuring the AirPods and the charging case have enough charge, enabling Bluetooth on your Mac, cleaning the connector pins on the charging case and the AirPods, etc. are a few standard things to do when your AirPods cease to connect with Mac.
Let’s go through what we did to fix an AirPods that doesn’t connect with a Mac:
- Make sure Bluetooth is enabled on your Mac
- Charge the charging case and AirPods
- Clean the connector pins to let them adequately charged
- Update macOS
- Select the proper audio output source
- Reset your AirPods
- Get in touch with Apple and get your AirPods repaired or replaced.
I hope you managed to fix your AirPods that won’t connect to your Mac by following the troubleshooting guide above.

