High-pitched voice from your AirPods can be extremely annoying, and it drains the battery too fast. Many AirPods users are facing a weird issue lately where it makes a high-pitched noise.
In this article, you will find why your AirPods is making a high-pitched noise and how to fix it in less than 5 minutes.
In most cases, it is a simple problem that can easily be fixed.
The high-pitch noise issue affects all models of AirPods, including the latest AirPods 3 and AirPods Pro. The steps to fix the problem are the same for all models. So let’s see how to fix it.
Why Are My AirPods Making a High-Pitched Noise?
In many cases, a high-pitched noise arises when your AirPods don’t have a good seal. If the ear tips seal is improper, the ANC (Active Noise Cancellation) feedback loop will kick in and try to compensate for the noise by getting louder. This loudness makes the AirPods make a high-pitched noise.
Not only is this high-pitched noise very irritating, but it also drains the battery of your AirPods, too.
Interference is yet another reason why your AirPods may make a high-pitched noise. If you have a speaker or other earbuds connected to a computer or phone via Bluetooth, try disconnecting them and using the AirPods again.
The mesh area of the AirPods protruding more than it should is also a concern of problem. Many people figured out it is also a possible reason why the AirPods is making a high-pitched noise.
This is actually a design problem and nothing much can be done about it other than adjusting the earbuds to fit.
A damaged AirPods also cause a similar problem where it will fail to work properly. If the internals of the AirPods, like the speaker unit, are damaged, a whistling sound may show up.
The high-pitched noise is similar to a kettle whistling when the water is about to boil.
Apart from the high-pitched noise, certain AirPods also make a weird beeping sound as well.
How To Fix AirPods High Pitched Noise?
After going through many support forums and talking to a couple of Apple support executives, I figured out a few solutions to fix the high-pitched noise problem on almost all AirPods models.
To fix AirPods high-pitched noise, try all the methods below one by one.
Disable Ear Detection and Noise Control
Disabling automatic ear detection and noise control options on your AirPods will help you easily get rid of the weird noise.
I tried this, and it worked for me. If you are in a hurry and want to fix the issue fast, just go ahead and disable both the options below.
So let’s see how to disable ear detection and noise control on your AirPods.
Firstly, ensure your AirPods is connected to your iPhone.
Open Settings.
Tap Bluetooth.
Under MY DEVICES section, tab the i button next to the AirPods’ name.
Scroll down and disable the option called Automatic Ear Detection.
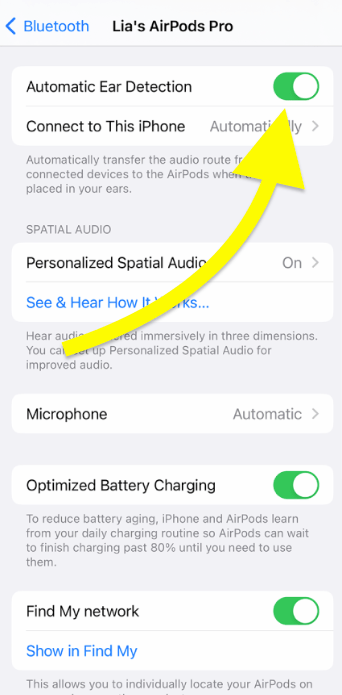
When fitting the earbuds, ensure the noise control option is disabled.
Once the automatic ear detection is turned off, you can keep the current noise control settings.
Ensure the DOUBLE TAP touch control is turned on, otherwise, AirPods won’t respond to double tap touch control.
Remove And Adjust The Ear Tips
Low quality seal is one of the reasons why your AirPods may make a weird noise. Many times, adjusting the ear tips to seal it better fix the problem.
As you probably know, you can easily remove the AirPods’ silicone ear tips by gently pulling them out.
To fix the problem, gently pull out the silicone ear tips from the AirPods.
If you have been using your AirPods for a very long time and have not cleaned it, chances are, many wax particles may have built up over time.
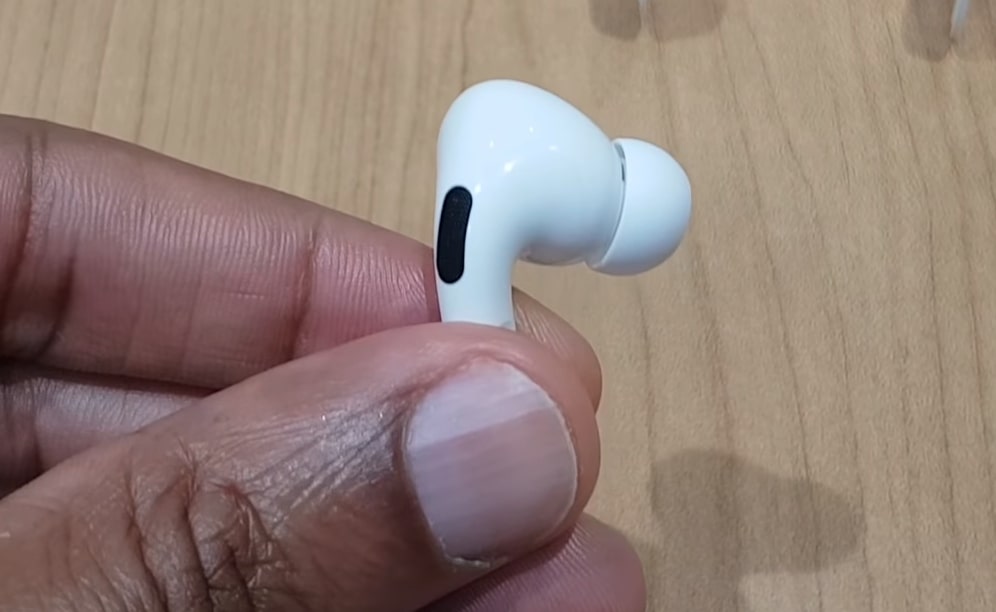
After removing the ear tips, see if any wax content needs to be cleaned. You may use a lint free cloth to clean the wax particles.
Once cleaned, put the silicone ear tips back and try to use your AirPods again.
Update AirPods Firmware
Outdated AirPods firmware can often cause issues like weird noise or connection problems.
It is always recommended that you should update your AirPods firmware regularly.
Apple delivers AirPods firmware update automatically when the AirPods and the phone is in the Bluetooth range.
Since the firmware update happens automatically, you don’t have to do anything to update it. But at times, the automatic AirPods firmware update may get delayed.
Follow the steps below to see if your AirPods have any pending firmware update.
Open Settings and head to Bluetooth settings.
Find your AirPods from the list and tap the i button next to it.
Scroll down and note the firmware version under the About section.
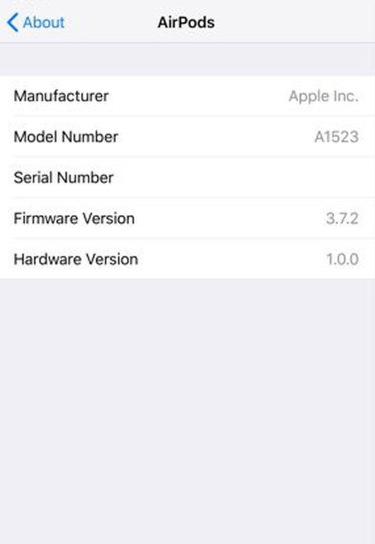
Visit the AirPods firmware status page to find the latest firmware info.
Compare the firmware versions and see if they are the same.
If the firmware versions are the same, you are good to go.
If the firmware is not updated, fully charge your AirPods and place them close to your iPhone with Internet enabled.
Your AirPods firmware should automatically get updated in a few minutes.
Reset The AirPods
If nothing works, the final thing to do is to factory reset the AirPods.
Factory resetting the AirPods will remove all the connection data and reset it to factory default settings. Factory setting has helped many people fix many issues like not able to connect to Mac, not charging etc.
Follow the steps below to reset your AirPods and AirPods Pro.
Place both the AirPods in the charging case and close the lid.
Wait for at least 30 seconds.
Now open the lid of the charging case and put the AirPods on your ears.
Ensure the AirPods are connected to your iPhone.
Open Settings.
Tap Bluetooth.
Tap the “i” button next to the name of your AirPods.
Scroll down, and tap Forget This Device.
Tap Forget This Device on the popup that appears to confirm.
Place the AirPods back into the charging case.
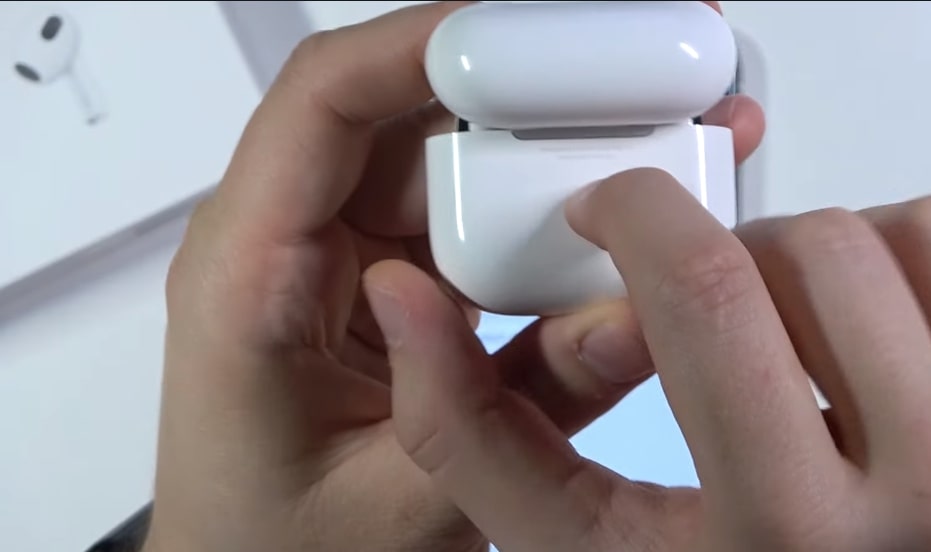
Press and hold the setup button towards the back of the AirPods for 15 seconds while keeping the lid open.
Release the setup button as soon as the status light flashes amber and then white.
You have successfully reset your AirPods.
Now that the AirPods is reset, the next step is to connect them back to your iPhone and link it with your Apple ID.
Turn on Bluetooth on your iPhone.
Bring the AirPods charging case close to your iPhone and open the lid.
A popup should now appear on your iPhone asking to pair the new AirPods.
Tap the Connect button.
Now press and hold the set up button on the back of the charging case for a few seconds.
As soon as the AirPods is connected to your iPhone, a pop will appear showing you the battery status of the AirPods on the charger case. You have successfully linked the AirPods to your Apple ID and paired it with your iPhone.
If you use your AirPods in a sauna or tanning bed, prolonged exposure to UV light, moisture, and high temperature may also make the AirPods beep or die.
What’s Next?
Now that you have successfully fixed the weird high-pitched noise issue on AirPods, you can start using them comfortably.
Turning off the automatic ear detection feature, cleaning the ear tips, updating the firmware, etc should help you fix the problem.